The Options dialog window contains several categories of
settings you are able to change. In the following sections screen
shots are shown where the settings for the user interface behavior
can be edited. Depending on the number of Toolboxes installed in
SNAP, the header area might contain different items.

The buttons "Export" and "Import" in the footer area of the dialog
window can be used to save or load all settings at once.
General Settings
This preferences page contains general user interface behavior
and memory management settings.
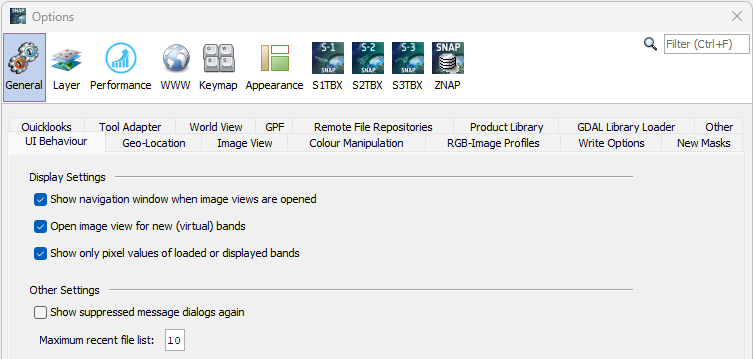
- Show navigation window when image views are opened
If an image view is opened the Navigation Window will also be
opened.
- Open image view for new (virtual) bands
Currently, this option only affects the Band Maths tool. If this option is selected, a
new image view is automatically created and opened for any new
bands created in the band maths tool.
- Show only pixel values of displayed bands
If selected, the pixel info view will only show pixel values of
bands which are currently displayed in an image view. If this
option is not selected, the Sentinel Toolbox displays all
bands contained in a product. For those bands which are currently
not displayed, the Sentinel Toolbox reads the sample values
directly from the product file. Depending on your computer's I/O
performance and the location of the product file (e.g. CD-ROM,
harddrive, network) this can have an impact on the runtime
performance.
- Maximum recent file list
Specify the number of recent files that appear in the File Menu under "Reopen Product".
- Show suppressed message dialogs again
Some dialogs of the Sentinel Toolbox can be disabled by checking
the option "Don't show this message again". You can select this
option to enable all message and tip dialog boxes again.
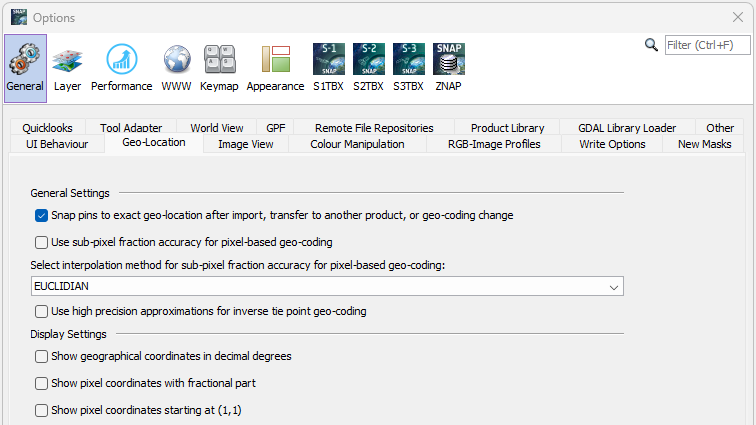
This preferences page enables settings related to the
geo-location of pixels, pins, etc.
The Sentinel Toolbox uses an image coordinate system whose origin
(x=0, y=0) is the upper left corner of the upper left pixel. Image
X-coordinates increase to the right, Y-values increase downwards.
The center of the pixel in the origin is then located at (x=0.5,
y=0.5).
- Snap pins to exact geo-location after import, transfer to
another product, or geo-coding change
Enables pins to be displayed at exact location on the image.
- Use sub-pixel fraction accuracy for pixel-based
geo-coding
When geo-coding is pixel-based, a sub-pixel fraction accuracy
shall be used (see also "Show pixel coordinates with fractional
part" below).
- Use high precision approximations for inverse tie point
geo-coding
When geo-coding is tie-point based, high precision inverse
approximations are used. Enabling this option slows down the
performance but increases the accuracy a bit further.
- Show geographical coordinates in decimal degrees
Use decimal degree values instead of minutes and seconds.
- Show pixel coordinates with fractional part
Don't display integer coordinates.
- Show pixel coordinates starting at (1,1)
In opposite to the default setting where the pixel coordinates
start at (0,0), let them count from (1,1).
This preferences page enables settings related to the
geo-location of pixels, pins, etc.
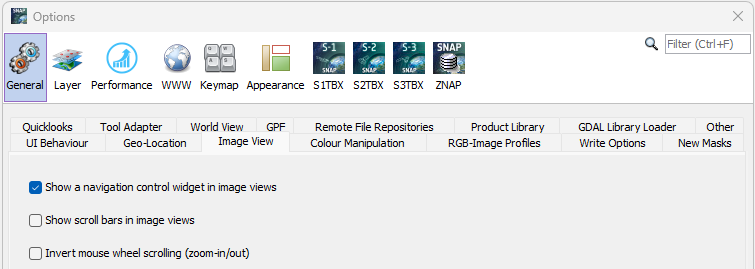
- Show a navigation control widget in image views
If this option is selected, the Sentinel Toolbox shows a
navigation widget in image views for moving and rotating images
within the viewport:

- Show scroll bars in image views
If this option is selected, image views are shown with horizontal
and vertical scroll bars.
- Invert mouse wheel scrolling (zoom in/zoom out)
For convenience, zoom in or out like e.g. in Google Earth.
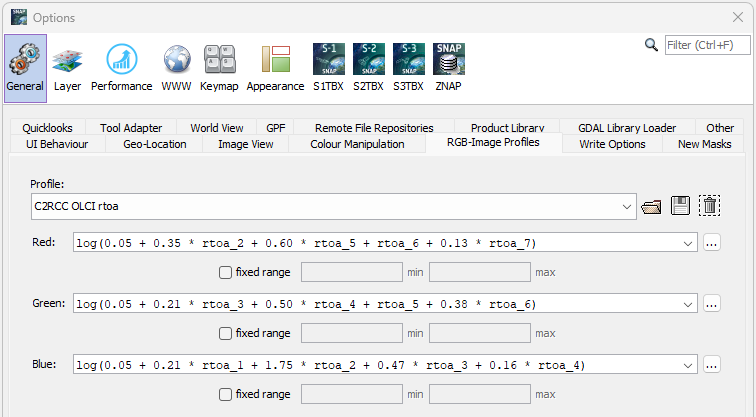
This preference page is used to edit the RGB profiles used for
RGB image creation from various product types. An RGB-Profile
defines the band maths expressions to be used for the red, green
and blue components of an RGB image. For detailed information about
RGB-Profiles please refer to the chapter RGB-Image Profile located at Sentinel
Toolbox Application/Tools/Imaging Tools
Profile
Lets you Select on of the actual stored RGB-Profiles to use for
creation of the new image view.
- Use the
 to open a stored RGB-Profile file.
- Use the
 to save the currently displayed RGB-Profile.
- Use the
 to delete the currently displayed RGB-Profile.
RGB Channels
- Red - Defines the mathematical expression for the red
channel.
- Green - Defines the mathematical expression for the
green channel.
- Blue - Defines the mathematical expression for the blue
channel.
Use the  to to edit the
expression for the specific channel by using the Maths Expression Editor.
Note: The expressions are not validated by
the Sentinel Toolbox, keep care of using the correct syntax.
Please refer to the Maths
Expression Editor documentation for the syntax and capablities
of expressions.
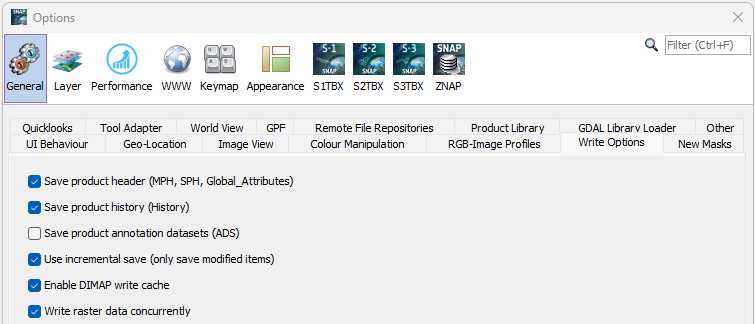
This preference page is used to edit the writing behaviour of
SNAP.
The first four entries are only relevant when products are saved
in BEAM-DIMAP
format.
- Save product header (MPH, SPH)
This options allows you to include/exclude the main product header
(MPH) and specific product header (SPH) of ENVISAT products in/from
the file being saved. If this option is selected, the Sentinel
Toolbox stores the MPH and SPH as meta-data in the BEAM-DIMAP (XML)
header.
It is recommended to always include this meta data.
- Save product history (History)
This option switches the saving of the processing history of the
product on or off. It is recommended to always include this meta
data to be able to track the processing stages and the original
product.
- Save product annotation data sets (ADS)
This options allows you to include/exclude all annotation data
sets (ADS) of ENVISAT products in/from the file being saved. If
this option is selected, The Sentinel Toolbox stores ADS as
meta-data in the BEAM-DIMAP (XML) header.
For ENVISAT products, location and annotation data sets (provided
at tie-points) need not to be stored as meta data, since the
Sentinel Toolbox automatically converts them into tie point
grids, which are separately saved.
- Use incremental Save
If this option is selected (recommended), the Sentinel Toolbox
will only save the modifications applied to a product, such as band
modified or created with band maths tool or the removal of
bands.
- Enable DIMAP write cache
If this option is selected (recommended), all data written to
DIMAP file format will be cached before accessing the storage
medium. This allows for a disk access schema suited for the
dataformat and thus in most cases a higher data throughput.
The last element generally concerns the writing process and thus
also all writeable formats.
- Write raster data concurrently
If this option is selected (recommended), the write operation uses
the processor cores in parallel to write raster data. This can
dramatically speed up the write process. However, it can also cause
problems if the writer is not implemented thread save.
If the data cannot be written in parallel, please disable this
option.

This preference page is used to edit the default mask overlay
colour and its transparency.
- Default mask overlay colour - Sets the default colour
for newly created masks. Select a colour from a pre-defined list or
customize it.
- Default mask overlay transparency - Sets the default
transparency for newly created masks. Enter a value between 0 and
1. 0 means opaque, 1 means transparent.

- Save quicklooks with product where possible - Specify
whether SNAP shall save a quicklook with the product.
- Max quicklook width in pixels - Set maximum width of
quicklook image.
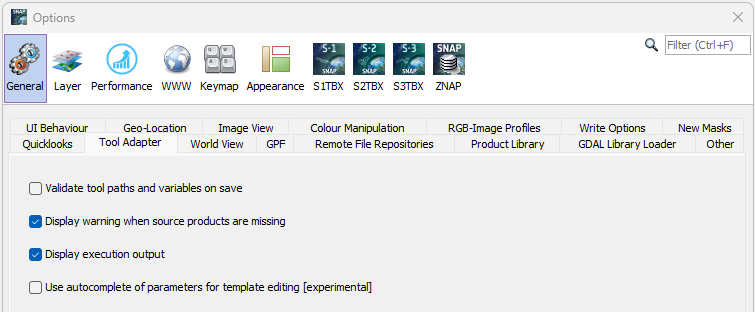
- Validate tool paths and variables on save - Explanatory
text.
- Display warning when source products are missing -
Explanatory text.
- Display execution output - Explanatory text.
- Use autocomplete of parameters for template editing
[experimental] - Explanatory text.

- Use flat Earth projection - Explanatory text.

- Beep when processing has finished - Generate a system
feedback after processing.

Put content here.
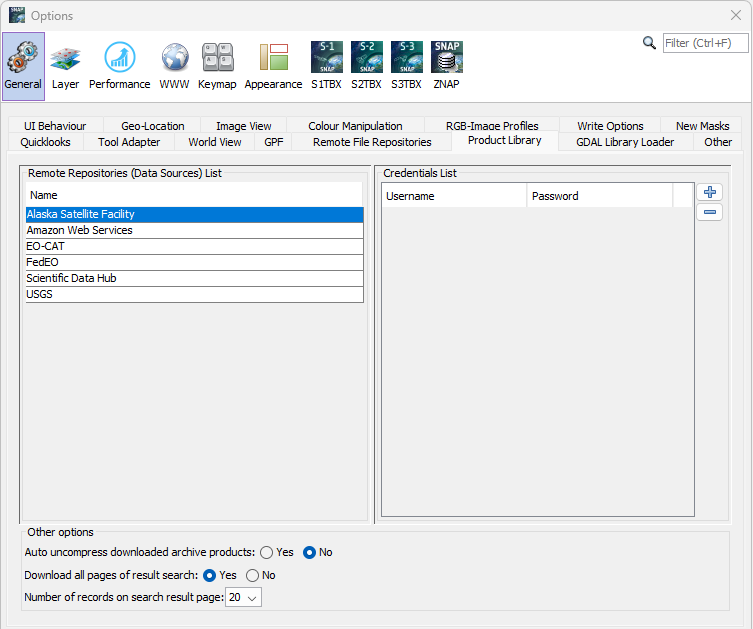
Put content here.
It is possible to configure the GDAL library loader to load one
of the installed GDAL distribution from the operating system or the
internal GDAL distribution within SNAP (version 3.2.1).
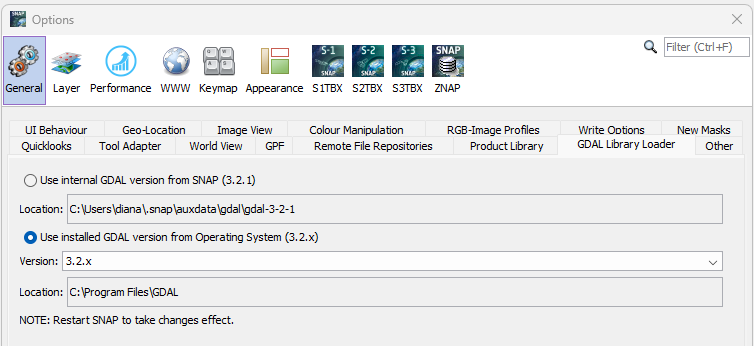
The internal GDAL distribution is used when no GDAL distribution is
installed on the operating system or when the installed version is
not compatible. If the first option is selected and a GDAL
distribution is installed on the operating system, SNAP will not
load it until the second option is selected.
Compatible versions
- Windows x86 (32 bit): from GDAL 2.1.X to GDAL 3.2.X
- Windows x64 (64 bit): from GDAL 2.1.X to GDAL 3.2.X
- Linux x64 (64 bit): from GDAL 2.0.X to GDAL 3.2.X
- MacOSX (64 bit): from GDAL 2.0.X to GDAL 3.2.X

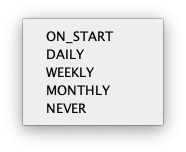
- Release check interval - Specify when a check for a new
SNAP release shall be performed. Available options are:
Layer Settings
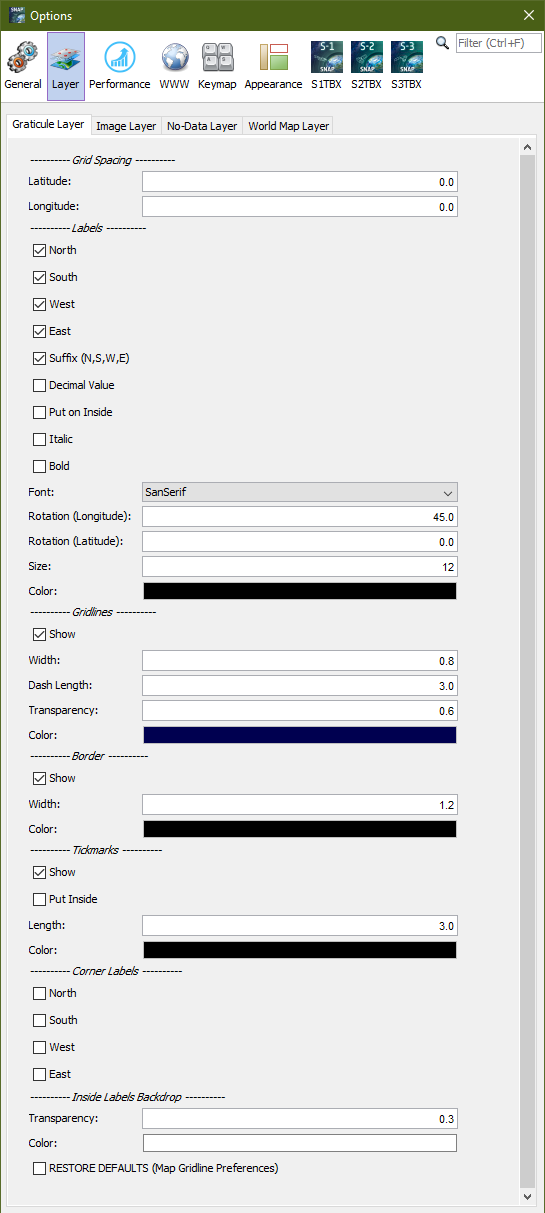
This preferences page provides options to customize the
Graticule Overlay.
You can find a detailed description here.
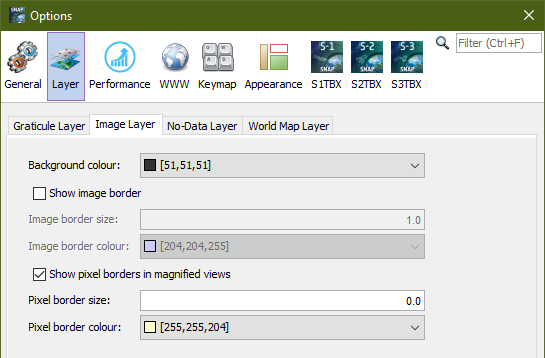
- Background colour - Select the background colour of the
image view from a pre-defined list or customize it.
- Show image border - Draw a border around the image
view.
- Image border size - Specify the image border size in
pixels.
- Image border colour - Select a colour from a pre-defined
list or customize it.
- Show pixel borders in magnified views - Draw a border
around pixels when zoomed in.
- Pixel border size - Specify the pixel border size in
pixels.
- Pixel border colour - Select a colour from a pre-defined
list or customize it.
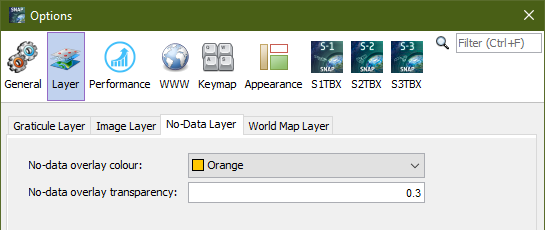
This preferences page provides options to customize the No-Data Overlay.
- No-data overlay colour - Sets the fill colour of the No-Data Overlay. Select the no-data
overlay colour from a pre-defined list or customize it.
- No-data overlay transparency - Sets the transparency of
the No-Data Overlay. Enter a value
between 0 and 1. 0 means opaque, 1 means transparent.
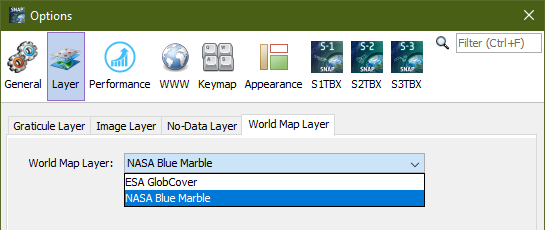
- World Map Layer - Select the layer type from a list.
Available options:

Performance Settings
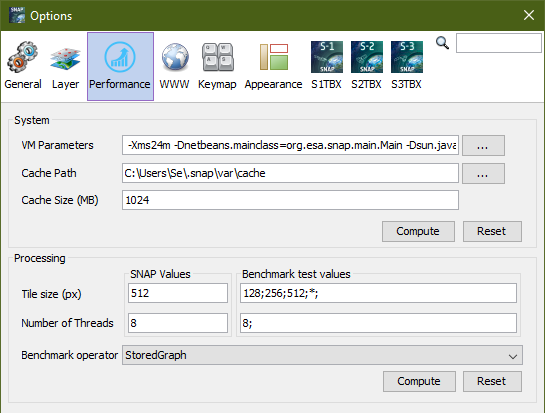
This preferences page contains settings for the Java VM and
processing parameters. Both settings might be computed by SNAP or
being reset to default values.
- VM Parameters - Please refer to Java HotSpot VM Options .
- Cache path - Path to the SNAP cache directory.
- Cache Size (MB) - Maximum size of the SNAP cache
directory.
- Tile size (px) - Explanatory text.
- Number of Threads - Explanatory text.
- Benchmark operator - Explanatory text.
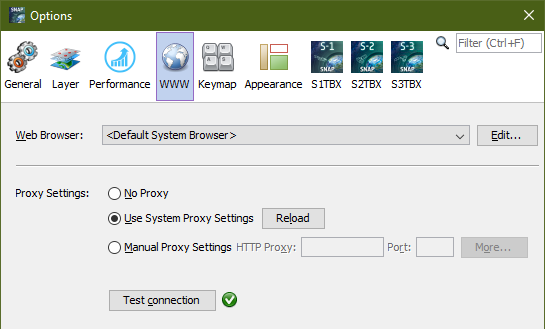
- Web Browser - Select your preferred web browser for
displaying content. Choose between either the system default or a
specific browser app.
- Proxy settings - Specify your proxy settings if
needed..
-
- No Proxy - Disable proxies
- Use System Proxy Settings - Reload proxy settings
defined in your system configuration.
- Manual Proxy Settings - Enter manual proxy settings.
Clicking on
 brings up the Advanced Proxy Settings dialog below.
- Test connection - Checks whether the proxy settings are
valid.
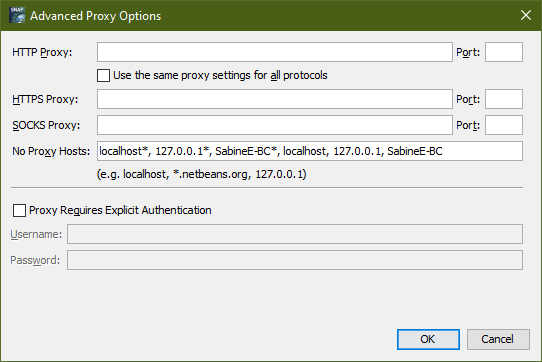
If you are behind a proxy you should configure your settings
here.
You are able to configure the settings for different protocols or
check the box to use the same settings for all
protocols.
- HTTP Proxy - Enter the HTTP proxy server address and the
port.
- HTTPS Proxy - Enter the HTTPS proxy server address and
the port.
- SOCKS Proxy - Enter the SOCKS proxy server address and
the port.
- Use HTTP proxy authentication
If your proxy requires authentication enable this option.
- User name:
Your user name.
- Password:
Your password.
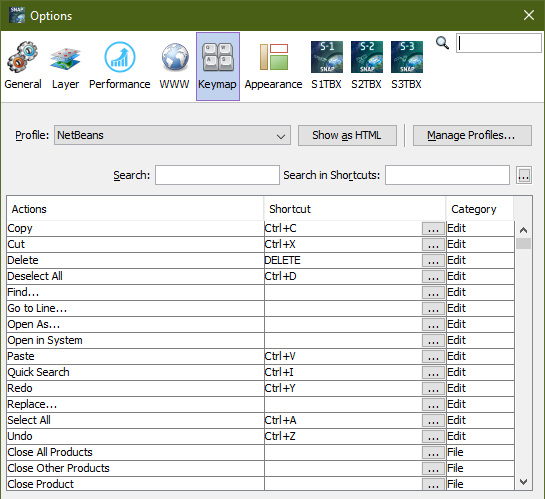
In this preference page you are able to change or create
keystrokes for actions within SNAP. Keymap settings can be edited,
stored and managed with this dialog.
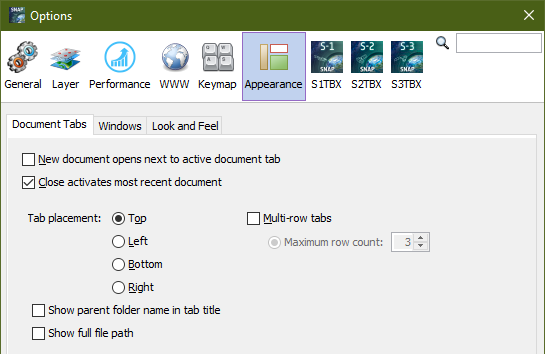
- New document opens next to active document tab - New
tabs are arranged next to the active tab.
- Close activates most recent document - When a document
is closed then the most recent document becomes active instead of
its neighbor.
- Tab placement - Define where tabs are displayed: at top,
left, bottom or right of the image view.
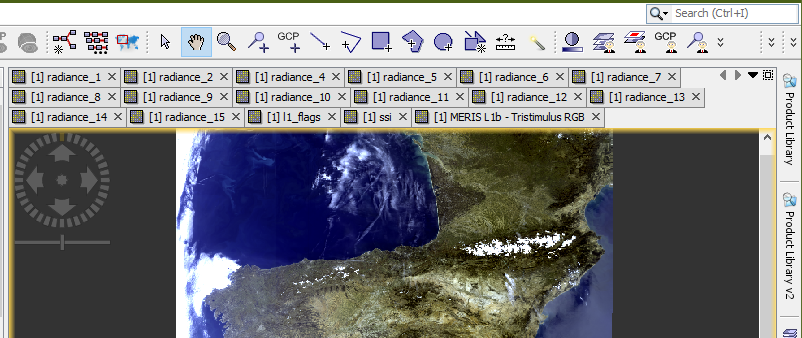
- Multi-row tabs - Specify whether tabs shall be displayed
in more than one row.
- Maximum row count - Specify the number of rows allowed,
e.g. 3. See image below.
- Show parent folder name in tab title - Display parent
folder name in tab.
- Show full file path - Specify the full path in tab.
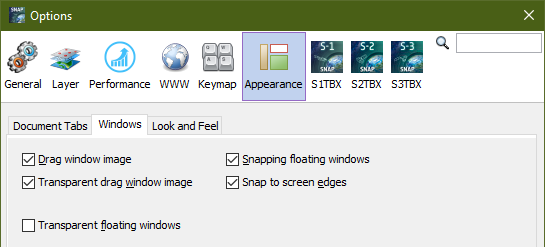
- Drag window image - Enables "ghost" window image during
drag and drop of a window.
- Transparent drag window image - Enables transparency in
drag window image.
- Snapping floating windows - Enables automatic snapping
of floating windows for easier layout handling.
- Snap to screen edges - Enables snapping of floating
windows to screen edges.
- Transparent floating windows - Makes unfocused floating
windows semi-transparent after a few seconds.
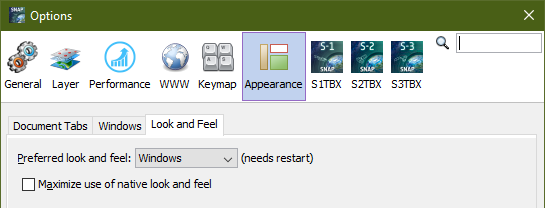
- Preferred look and feel - Select your favourite
look-and-feel from a list. Note that the activation requires a
restart of SNAP.
- Maximize use of native look and feel - NetBeans uses
native UI components when those offer sufficient functionality.
Select this option to force the use of native components, even when
that may limit functionality (e.g. macOS file chooser).


![]() to to edit the
expression for the specific channel by using the Maths Expression Editor.
to to edit the
expression for the specific channel by using the Maths Expression Editor.


